What You Can and Can’t Embed in Epoxy Resin (Complete Guide)
Epoxy resin has quickly become one of the most popular materials in DIY crafts, jewellery making, and home décor. Its crystal-clear finish, durability, and endless creative possibilities make it ideal for both beginners and professionals. One of the most exciting techniques is embedding objects in resin, allowing you to preserve memories inside stunning, glass-like creations.
If you’re wondering what you can and can’t embed in epoxy resin, this guide covers everything—from safe materials to avoidable mistakes, along with advanced techniques to achieve professional results.
Why Embed Objects in Resin?
Embedding objects in resin is not just about decoration—it’s about storytelling and preservation. Resin allows you to capture meaningful items and turn them into long-lasting keepsakes.
- Personalisation: Preserve flowers, photos, or sentimental items.
- Aesthetic appeal: Adds depth and dimension to your projects.
- Durability: Protect delicate materials like petals and paper.
- Unique designs: Every piece becomes one-of-a-kind.
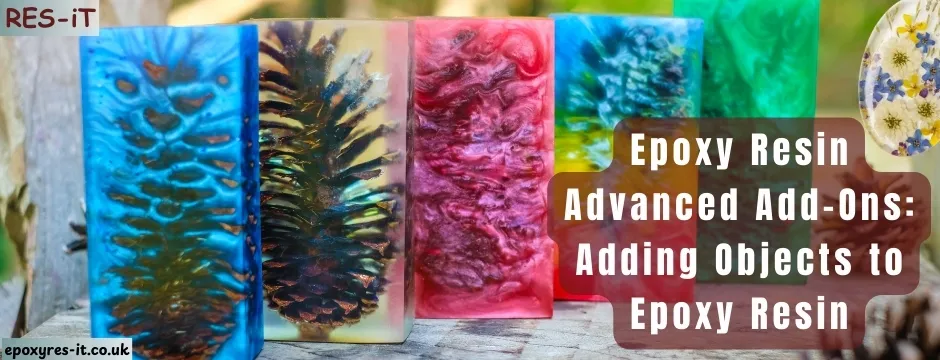
What You Can Embed in Epoxy Resin
Choosing the right materials ensures durability and a flawless finish. Here are safe and commonly used items:
- Dried flowers, leaves, and petals
- Shells, stones, and crystals
- Glitter, mica powder, and pigments
- Coins, charms, and small metal objects
- Photographs (sealed properly)
- Paper cut-outs and fabric (sealed)
- LED lights, magnets, and decorative elements
What You Can’t Embed in Epoxy Resin
Some materials can ruin your project or cause long-term damage. Avoid embedding the following:
- Fresh flowers or leaves (contain moisture)
- Wet or damp materials
- Food items (can rot or discolour)
- Soft plastics (may melt or react)
- Unsealed paper or photos
- Living organisms (ethical and decay issues)
Tip: Always ensure materials are completely dry and sealed before embedding.
Materials and Tools You Will Need
- High-quality epoxy resin (e.g. Res-iT Epoxy Resin Kit)
- Silicone moulds
- Mixing cups and sticks
- Tweezers for precision placement
- Heat gun or torch (bubble removal)
- Protective gear (gloves, mask, apron)
How to Embed Objects in Epoxy Resin
Prepare Your Workspace
Work in a clean, dust-free, and well-ventilated area. Protect your surface with a silicone mat.
Mix the Resin
Follow the manufacturer’s instructions carefully. Mix slowly to avoid creating bubbles.
Pour the Base Layer
Pour a thin base layer and allow it to become slightly tacky before placing objects.
Position the Objects
Use tweezers to carefully place items. Arrange them precisely as they will stay fixed.
Seal Porous Materials
Seal paper, fabric, or flowers with a clear sealant to prevent bubbles and discolouration.
Pour Final Layers
Add resin in thin layers until objects are fully covered. Use a heat gun to remove bubbles.
Curing
Allow the resin to cure for 24–48 hours without disturbance.
Advanced Tips for Perfect Results
- Layering: Create depth by embedding objects in multiple layers.
- Prevent floating: Secure lightweight items with a thin base layer.
- Bubble removal: Use heat carefully after each layer.
- Custom backgrounds: Add pigments or glitter for unique effects.
- Seal photos: Always seal photos before embedding.
Common Mistakes to Avoid
- Bubbles around objects – seal materials properly
- Discolouration – avoid moisture
- Floating items – pour in layers
- Uneven surface – avoid overfilling moulds
Creative Resin Project Ideas
- Resin jewellery with flowers or glitter
- River tables with stones or LEDs
- Keepsake coasters
- Photo frames with metallic flakes
- Decorative resin art blocks
Final Thoughts
Embedding objects in epoxy resin opens up endless creative possibilities. With the right materials and techniques, you can transform everyday items into durable and visually stunning pieces.
Turn memories into masterpieces—let your creativity shine through every drop of resin.


