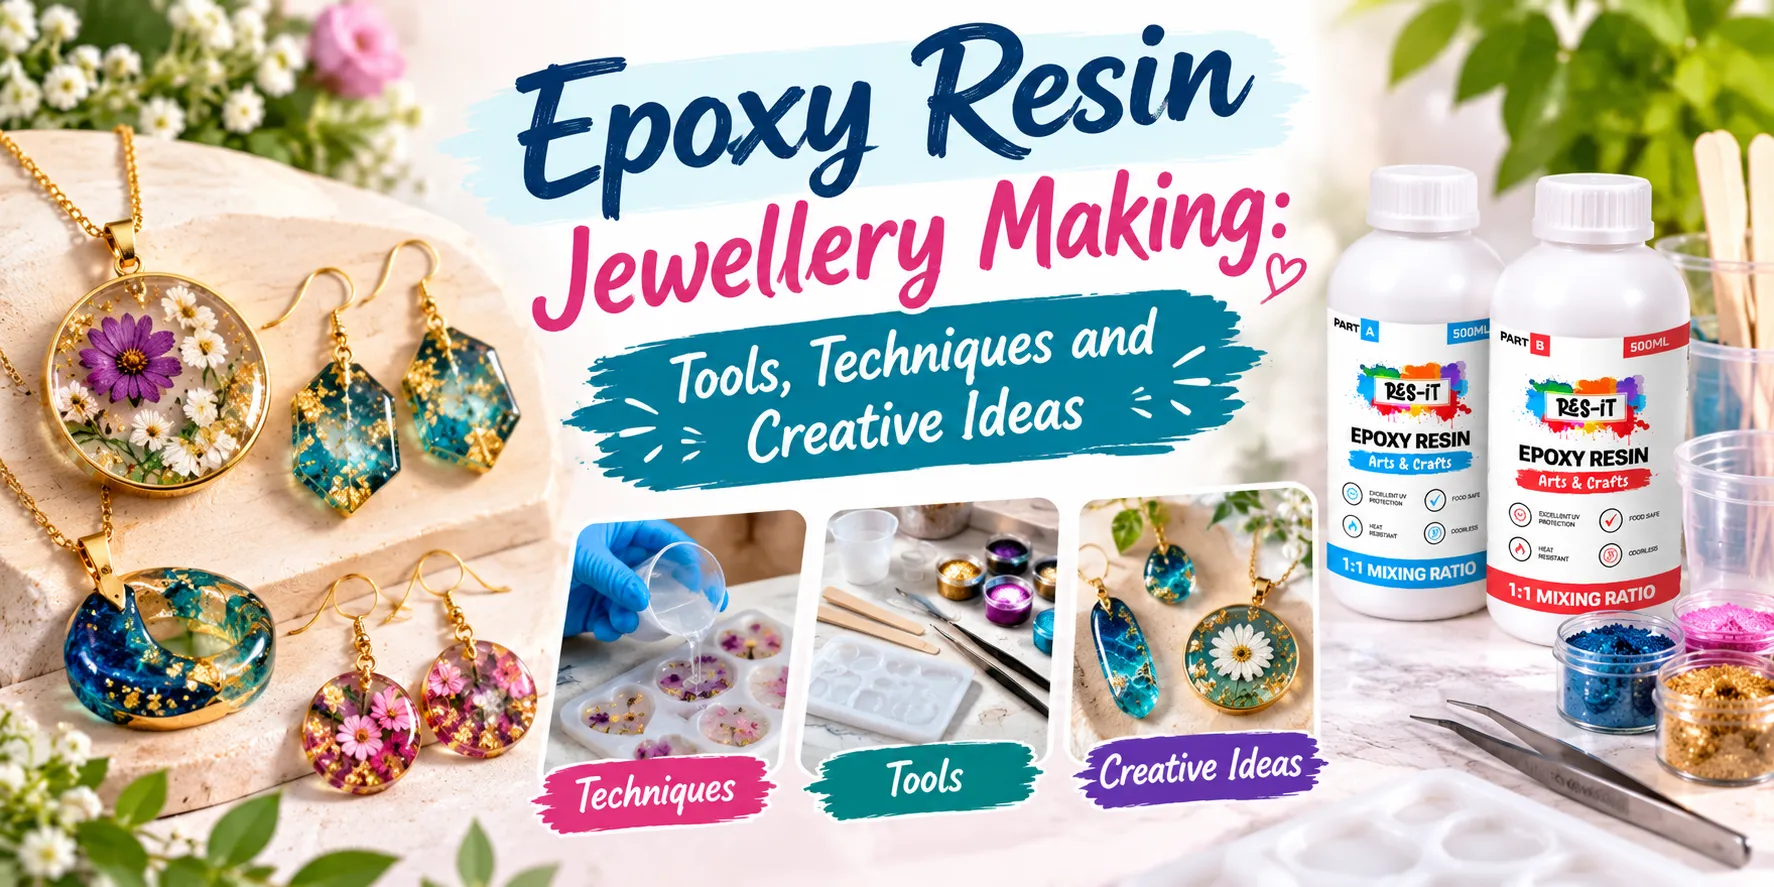
Epoxy Resin Jewellery Making: Tools, Techniques and Creative Ideas
Epoxy resin jewellery making has become a popular choice for DIY enthusiasts, handmade jewellery designers and creative hobbyists. From delicate floral pendants to colourful resin earrings, personalised necklaces and sparkling bracelets, epoxy resin makes it possible to turn simple materials into beautiful handmade accessories.
One of the best things about making resin jewellery is the freedom to experiment. You can combine dried flowers, glitter, metallic pigments, decorative flakes and different colours to create pieces that reflect your personal style. Whether you are trying resin crafts for the first time or looking to improve your jewellery-making skills, the right epoxy resin, tools and techniques can make a noticeable difference to your results.
However, achieving professional-looking resin jewellery is not just about choosing attractive colours. Accurate measuring, thorough mixing, suitable moulds and proper curing all play an important role in producing clear, smooth and durable pieces.
In this guide, we will explore everything you need to know about epoxy resin jewellery making, including essential supplies, step-by-step instructions, creative project ideas, common mistakes and helpful tips for beginners.

3L Deep Pour Epoxy Resin Starter Kit

6L Pro Kit Deep Pour Resin
What Is Epoxy Resin Jewellery Making?
Epoxy resin jewellery making is the process of creating decorative accessories using a two-part epoxy resin system. It generally consists of two components: resin and hardener. When these components are mixed in the correct ratio, a chemical reaction begins, gradually transforming the liquid mixture into a solid material.
Once fully cured, epoxy resin can create a clear, glossy surface that works beautifully for jewellery designs. It can also be combined with decorative materials to produce unique patterns, colours and effects.
Some popular epoxy resin jewellery projects include:
- Handmade resin earrings in different shapes and colours.
- Personalised resin necklaces and pendants.
- Flower-filled jewellery with dried botanical decorations.
- Glitter resin bracelets and decorative charms.
- Custom keyrings and small resin accessories.
- Ocean-inspired jewellery with blue and turquoise pigments.
- Minimalist transparent resin jewellery with delicate inclusions.
Unlike mass-produced accessories, handmade resin jewellery gives you the opportunity to create something personal. Every design can have different colours, patterns and decorative details.
What Supplies Do You Need to Make Epoxy Resin Jewellery?
Before starting your first project, it is important to prepare the right resin jewellery making supplies. Having suitable equipment makes the process easier, helps reduce mistakes and allows you to achieve a more consistent finish.
1. High-Quality Epoxy Resin
Epoxy resin is the main material used in resin jewellery making. For small jewellery projects, choose a suitable clear-casting epoxy resin that is designed for the thickness and type of mould you are using.
A good-quality resin should offer:
- Clear and glossy results when properly mixed and cured.
- Suitable working time for arranging decorative elements.
- Reliable curing performance when used according to instructions.
- Good compatibility with appropriate colourants and decorative materials.
- A suitable viscosity for filling small jewellery moulds.
For beginners, an easy-to-use 1:1 epoxy resin kit can be a convenient starting point. The Epoxy Res-iT Starter Kits are worth exploring for small DIY projects, jewellery making and creative experiments.
Always check the product's technical instructions before using it. Different epoxy resin formulations have different mixing ratios, working times and recommended casting depths.
2. Silicone Jewellery Moulds
Silicone moulds are essential for creating resin earrings, pendants, charms and other jewellery components. They are available in various shapes, including circles, hearts, flowers, geometric patterns and abstract designs.
For the best results, look for smooth, flexible silicone moulds with clean edges. High-quality moulds help create neat shapes and make it easier to release fully cured resin pieces.
3. Measuring Cups and Mixing Stirrers
Accurate measuring is one of the most important parts of epoxy resin jewellery making. Resin and hardener must be combined according to the manufacturer's specified ratio.
Reusable or disposable measuring cups and suitable mixing sticks help you measure and blend both components properly. If you want to make several small jewellery pieces, preparing the correct quantity in advance can also reduce material waste.
4. Precision Digital Weighing Scale
A digital weighing scale is useful when your epoxy resin instructions specify mixing by weight. It helps you measure both components accurately, especially when working with small batches.
Always remember that a 1:1 ratio by volume is not necessarily the same as a 1:1 ratio by weight. Follow the instructions for your particular resin system rather than assuming the measurements are interchangeable.
5. Mica Powder and Resin Pigments
Colour is one of the most exciting parts of creating handmade resin jewellery. Mica powder and compatible resin pigments allow you to experiment with different shades, metallic effects and artistic patterns.
Popular colour choices include:
- Gold and champagne for elegant jewellery designs.
- Rose gold and pink for soft, feminine accessories.
- Emerald green for rich gemstone-inspired effects.
- Turquoise and blue for ocean-inspired jewellery.
- Silver and pearl for modern, minimalist pieces.
- Black and white for contrasting geometric designs.
Epoxy Res-iT mica powders can help add colour and shimmer to suitable resin projects. Start with a small amount and gradually adjust the intensity until you achieve your desired appearance.
6. Additional Safety and Finishing Equipment
Along with the main supplies, you may need a few additional tools to make the process more convenient.
- Nitrile gloves to help protect your hands from uncured resin.
- Suitable protective eyewear.
- A properly selected respirator where required by the resin's safety data sheet.
- Fine-grit sandpaper for smoothing fully cured edges.
- Jewellery findings, such as earring hooks, jump rings and necklace chains.
- Small tweezers for positioning dried flowers and decorative inclusions.
- Lint-free cloths for cleaning suitable tools and surfaces.
Always work in a well-ventilated area and follow the manufacturer's safety data sheet. Wear appropriate protective equipment and avoid direct skin contact with uncured resin. A respirator should be selected according to the product's specific ventilation and exposure requirements.
How to Make Epoxy Resin Jewellery Step by Step
Making resin jewellery is a rewarding DIY activity, but the process requires patience and attention to detail. Follow these steps to create your own handmade resin pendant or earrings.
Step 1: Prepare Your Workspace
Start by selecting a clean, level and well-ventilated workspace. Cover the surface with a suitable protective sheet and organise your moulds, mixing cups, stirrers, pigments and decorative materials.
Make sure your silicone moulds are completely clean and dry. Even tiny dust particles, hairs or moisture can affect the appearance of your finished jewellery.
Step 2: Measure the Resin and Hardener
Read the instructions supplied with your epoxy resin kit before mixing. Measure the resin and hardener using the specified ratio and measurement method.
A small digital scale or suitable graduated measuring cups can help you achieve accurate measurements. Avoid estimating quantities because incorrect proportions may lead to sticky, soft or improperly cured jewellery.
Step 3: Mix Both Components Thoroughly
Pour the measured components into a clean mixing cup. Stir slowly and consistently, scraping the sides and bottom of the container to ensure both materials are properly combined.
Mixing too quickly can introduce unnecessary air bubbles. Follow the recommended mixing time provided by the manufacturer, as different formulations require different preparation times.
Step 4: Add Colours and Decorative Elements
Once your resin is properly mixed, you can customise it with compatible pigments, mica powder or glitter.
For more detailed designs, prepare separate small batches of coloured resin. This allows you to create multiple shades and experiment with different patterns inside the same mould.
Remember not to add excessive pigment or decorative materials. Too much colourant or unsuitable additives can affect the resin's curing performance and final appearance.
Step 5: Pour Resin into the Jewellery Mould
Carefully pour the prepared resin into your silicone mould. Work slowly to avoid overflowing the edges and to minimise trapped air.
If you are creating layered jewellery, pour a thin first layer, arrange your decorations and add another layer if your resin system allows it. Follow the manufacturer's recommended maximum casting depth.
Step 6: Add Flowers, Glitter or Other Decorations
This is where you can make your jewellery designs truly personal. Carefully position dried flowers, metallic flakes, glitter or other suitable decorative inclusions using tweezers.
Try to arrange decorative elements so they remain visible from the front of the finished piece. For a balanced appearance, avoid overcrowding the mould.
Step 7: Remove Air Bubbles Carefully
Small air bubbles can sometimes appear during mixing and pouring. Allowing the resin to rest for a short period, where permitted by the manufacturer's working-time instructions, can help some bubbles rise naturally.
Use only a bubble-removal method recommended for your particular resin. Excessive heat or an unsuitable flame can damage silicone moulds, affect curing and create a fire hazard. Never use an open flame near resin or flammable materials.
Step 8: Allow the Resin to Cure
Place the filled mould on a level surface in a clean, protected area. Leave it undisturbed for the full curing period specified by the manufacturer.
Temperature and humidity can influence curing performance. Follow the product's recommended environmental conditions rather than relying on a fixed curing time.
Step 9: Demould and Finish Your Jewellery
Once the resin has fully cured, gently remove the jewellery pieces from the silicone mould. Avoid pulling or bending them excessively.
If the edges are slightly rough, carefully smooth them using suitable fine-grit abrasive materials. Remove all sanding dust before attaching jewellery findings.
Finally, attach your earring hooks, pendant loops or necklace chains using appropriate jewellery findings. Your handmade epoxy resin jewellery is now ready to wear or gift.
Creative Epoxy Resin Jewellery Ideas to Try at Home
One of the biggest advantages of resin jewellery is the variety of designs you can create. You do not need expensive equipment or advanced artistic skills to start experimenting.
1. Dried Flower Resin Jewellery
Dried flower jewellery is a beautiful choice for anyone who loves delicate and nature-inspired accessories. Small pressed flowers, petals and leaves can be embedded inside clear resin to create elegant pendants and earrings.
Choose completely dry flowers and position them carefully inside the mould. Transparent resin helps preserve their appearance while creating a glass-like decorative effect.
2. Gold and Metallic Resin Earrings
For a luxurious look, experiment with gold mica powder, metallic flakes and neutral shades. Gold and champagne combinations work particularly well in geometric earrings, statement pendants and minimalist accessories.
You can also combine metallic details with transparent resin for a more subtle design.
3. Ocean-Inspired Resin Necklaces
Ocean-inspired jewellery is perfect for creative colour combinations. Mix different shades of blue, turquoise and white to create wave-like patterns and flowing designs.
A small amount of white pigment can help create the appearance of sea foam, while transparent resin adds depth to the finished pendant.
4. Glitter Resin Jewellery
Glitter is an easy way to add sparkle to handmade accessories. You can create completely glitter-filled earrings or combine small glitter particles with transparent and coloured resin.
Experiment with silver, rose gold, holographic and iridescent glitter to achieve different effects.
5. Birth Flower and Personalised Jewellery
Personalised resin jewellery makes a thoughtful gift for birthdays, anniversaries and special occasions. You can create pendants using favourite colours, dried flowers, initials or other small decorative details.
These designs are especially appealing because every piece can be made to represent a personal memory or meaningful moment.
6. Marble Effect Resin Pendants
Marble-inspired jewellery can create a sophisticated appearance without complicated techniques. Combine white, black, grey or beige resin in small quantities and gently swirl the colours together.
Avoid overmixing if you want to maintain distinct marble-like patterns.
7. Minimalist Transparent Resin Jewellery
Sometimes a simple design looks the most elegant. Clear resin with a tiny dried flower, delicate gold flakes or a single decorative inclusion can create beautiful everyday jewellery.
This style is ideal for beginners who want to practise pouring, layering and working with small moulds.
Tips for Making Clear and Professional-Looking Resin Jewellery
If you want your handmade jewellery to look neat and attractive, focus on preparation and consistency. Small improvements in your working process can make a significant difference to the final result.
- Use suitable epoxy resin: Select a formulation intended for small casting projects and jewellery moulds.
- Measure accurately: Incorrect mixing ratios are a common cause of curing problems.
- Mix slowly: Thorough, controlled mixing helps reduce unnecessary air bubbles.
- Keep moulds clean: Dust and debris can become trapped in the finished jewellery.
- Use dry decorations: Moisture inside flowers and other inclusions can affect the final appearance.
- Control pigment quantities: Adding too much colourant can interfere with curing.
- Maintain suitable conditions: Work within the temperature and humidity recommendations for your resin.
- Allow complete curing: Do not demould or wear jewellery before it has fully cured.
- Protect finished pieces: Store your jewellery away from excessive heat, direct sunlight and harsh chemicals.
Common Resin Jewellery Making Mistakes and How to Avoid Them
Beginners sometimes experience sticky surfaces, trapped bubbles, uneven colours or jewellery pieces that do not cure properly. Most of these issues can be reduced by following the correct preparation and curing procedures.
Why Is My Epoxy Resin Jewellery Still Sticky?
Sticky resin can result from inaccurate measurements, incomplete mixing, unsuitable environmental conditions or disturbing the curing process. Always measure according to the specified ratio and mix thoroughly.
If a piece remains sticky after the recommended curing period, check the manufacturer's troubleshooting instructions rather than assuming that an additional coating will fix the problem.
How Can I Prevent Bubbles in Resin Jewellery?
Pour slowly, mix carefully and avoid introducing excessive air while stirring. Some resins benefit from a short resting period before pouring, although this depends on the product's working time and viscosity.
Why Does My Resin Jewellery Have Uneven Colours?
Uneven colour distribution can occur when pigments are not properly dispersed or when too much colourant is added. Mix compatible pigments carefully and prepare separate batches if you want different shades.
Why Is My Resin Jewellery Difficult to Remove from the Mould?
Removing resin too early can cause bending, damage or rough edges. Allow the piece to cure fully and use flexible silicone moulds designed for jewellery casting.
How Can I Get Smooth Edges on Resin Earrings?
Carefully sand fully cured edges using suitable fine-grit abrasive materials. Work gradually and use appropriate dust protection. Clean the jewellery thoroughly before attaching metal findings.
Which Epoxy Resin Is Best for Jewellery Making?
Choosing the right epoxy resin is important because not every formulation is designed for the same type of project. Some products are intended for thin coatings, while others are designed for deeper casting applications.
For jewellery making, a suitable clear-casting resin with an appropriate working time and casting depth is generally a better choice than a product intended exclusively for thick river-table pours.
Before choosing a resin, consider the following factors:
- Mixing ratio: Choose a system with clear and manageable mixing instructions.
- Viscosity: A suitable consistency makes it easier to fill small moulds and position decorations.
- Working time: Allow enough time to mix colours and arrange decorative inclusions.
- Curing time: Check the full curing schedule before planning your project.
- Clarity: Look for a resin designed to produce clear results when correctly mixed and cured.
- Compatibility: Make sure your pigments, glitter and other inclusions are suitable for the resin.
Epoxy Res-iT offers different resin kits and creative accessories for DIY and craft projects. If you are starting with small jewellery designs, explore the available Starter Kits and choose a formulation based on its technical specifications and recommended casting depth.
For adding colour and decorative effects to your jewellery, explore Epoxy Res-iT mica powders and compatible pigments.
Having the right measuring and mixing accessories can also help you prepare consistent batches and make your crafting process easier.
How to Make Money Selling Handmade Resin Jewellery
Epoxy resin jewellery can also become a creative small-business opportunity. Handmade accessories are popular for gifts, personalised products and unique fashion designs.
If you are thinking about selling your creations, start by developing a small collection with consistent quality and distinctive designs.
Choose a Jewellery Style
Instead of making every possible design, focus on a particular style. For example, you could specialise in floral pendants, minimalist earrings, ocean-inspired jewellery or personalised gifts.
Calculate Your Production Costs
Before setting prices, calculate the cost of resin, hardener, pigments, moulds, jewellery findings, packaging and other materials. Include your working time when deciding how much to charge.
Create Attractive Product Photography
Good photography can make a major difference when selling handmade jewellery online. Use natural lighting, clean backgrounds and close-up images to highlight the colours, transparency and details of each piece.
Offer Personalised Designs
Personalisation can help your products stand out. Consider offering different colour combinations, flower arrangements, initials and gift packaging options.
Promote Your Jewellery Online
Use Instagram, Pinterest, Facebook and other suitable platforms to share your finished products, making videos and behind-the-scenes crafting content. Short videos showing the pouring, colouring and demoulding process can help potential customers understand the work involved in handmade resin jewellery.
Frequently Asked Questions About Epoxy Resin Jewellery Making
1. Can beginners make epoxy resin jewellery at home?
Yes. Beginners can make epoxy resin jewellery at home using a suitable resin kit, silicone moulds, measuring cups, mixing tools and decorative materials. Start with simple pendants or earrings before trying more detailed designs.
2. What is the best epoxy resin for making jewellery?
The best resin is a clear-casting formulation designed for small moulds and suitable for your chosen jewellery project. Check its viscosity, working time, mixing ratio and recommended casting depth before purchasing.
3. How long does epoxy resin jewellery take to cure?
Curing times vary depending on the resin formulation, room temperature, humidity and casting thickness. Always follow the manufacturer's instructions and allow the full recommended curing period before removing or wearing your jewellery.
4. Can I put dried flowers inside epoxy resin jewellery?
Yes. Completely dried and pressed flowers can be used as decorative inclusions. Make sure they contain no moisture before embedding them in resin.
5. Can I use mica powder in resin jewellery?
Yes. Compatible mica powder can add beautiful metallic, pearlescent and shimmering effects to epoxy resin jewellery. Start with a small quantity to avoid affecting the curing process.
6. Why are bubbles appearing in my resin jewellery?
Bubbles can develop during mixing, pouring or when air becomes trapped around decorative inclusions. Mix slowly, pour carefully and use a suitable bubble-removal method recommended for your resin.
7. Can epoxy resin jewellery get wet?
Fully cured epoxy resin jewellery can generally tolerate occasional contact with water, depending on its formulation and construction. However, avoid prolonged soaking, harsh chemicals and unnecessary exposure to moisture to help maintain its appearance.
8. How do I make resin earrings look professional?
Use clean silicone moulds, accurate measurements, compatible pigments and suitable jewellery findings. Carefully finish rough edges and allow the resin to cure completely before assembling the earrings.
9. Can I mix glitter with epoxy resin?
Yes. Suitable resin-compatible glitter can be mixed into epoxy resin or added in layers to create sparkling jewellery designs. Use moderate quantities for the best results.
10. Is epoxy resin jewellery suitable for everyday wear?
Fully cured and properly finished resin jewellery can be suitable for everyday decorative use. However, avoid excessive heat, scratches, harsh chemicals and prolonged direct sunlight. Make sure all surfaces are fully cured before wearing.
Start Creating Your Own Epoxy Resin Jewellery with Epoxy Res-iT
Epoxy resin jewellery making is a creative way to turn simple materials into beautiful handmade accessories. Whether you love delicate dried flower pendants, colourful statement earrings, glitter-filled charms or elegant metallic designs, there are endless possibilities to explore.
The key to achieving attractive results is choosing a suitable resin, using accurate measurements, mixing thoroughly and allowing enough time for complete curing. With the right tools and a little practice, even beginners can develop their own jewellery-making style.
At Epoxy Res-iT, you can explore epoxy resin kits, mica powders and useful mixing accessories to support your next creative project. Choose the materials that suit your design, prepare your workspace and start experimenting with your own handmade resin jewellery.