How to Create 3D Effects in Epoxy Resin Using Different Layers
Epoxy resin is one of the most exciting materials for creating beautiful, glossy, and artistic projects. Whether you are making decorative trays, resin coasters, wall art, jewellery, tabletops, or personalised gifts, epoxy resin gives you endless opportunities to experiment with colours, textures, and designs. One technique that can make your artwork look especially impressive is creating 3D effects using different resin layers.
Unlike a simple flat resin design, layered epoxy resin art creates an illusion of depth, making decorative elements appear as if they are floating inside the artwork. By combining transparent resin, coloured pigments, glitter, metallic flakes, dried flowers, and other decorative materials, you can create stunning three-dimensional designs that attract attention.
The best part is that you do not need to be a professional resin artist to achieve beautiful results. With the right epoxy resin, suitable pigments, basic tools, and a little patience, beginners can also learn how to create 3D effects in epoxy resin.
In this guide, we will explain everything you need to know about epoxy resin layering techniques, including the materials required, preparation methods, step-by-step instructions, creative design ideas, and common mistakes to avoid. You will also discover how choosing quality resin supplies can improve your results and help you create professional-looking resin artwork.

3L Deep Pour Epoxy Resin Starter Kit

6L Pro Kit Deep Pour Resin

12L Pro Kit Deep Pour Resin
What Are 3D Effects in Epoxy Resin?
3D effects in epoxy resin are created by placing different colours, patterns, and decorative elements at separate levels inside a resin project. Instead of mixing everything into one layer, artists build their designs gradually by pouring multiple layers of resin.
Each layer adds another visual dimension to the finished piece. For example, you can place blue pigments in the background, add decorative shells in the middle, and finish with a transparent top layer. When viewed from above, the different elements appear to have depth and dimension.
This technique is particularly popular for ocean-inspired resin art, floral preservation, decorative jewellery, resin clocks, serving trays, and custom tabletops.
The secret to achieving a realistic 3D appearance is using transparent resin strategically. Clear layers allow viewers to see the decorative elements underneath, creating the illusion that different objects are suspended at different depths.
Why Use Different Layers to Create 3D Resin Art?
Layering epoxy resin offers more creative freedom than a single-pour technique. It allows you to control the position, colour, and appearance of individual decorative elements while creating a more detailed finished design.
Here are some important reasons why resin artists love working with multiple layers:
- Creates realistic depth: Multiple transparent and coloured layers make designs look deeper and more dimensional.
- Highlights decorative elements: Flowers, glitter, shells, stones, and other inclusions become more noticeable when placed at different levels.
- Improves colour combinations: You can combine transparent, translucent, and opaque pigments without mixing all the colours together.
- Allows creative freedom: Different layers make it easier to experiment with ocean waves, galaxies, floral patterns, and abstract designs.
- Produces professional-looking results: Properly planned layers can transform simple resin projects into attractive decorative pieces.
- Supports custom designs: You can create personalised artwork using names, photographs, decorative objects, and special keepsakes.
Materials and Supplies Needed to Create 3D Effects in Epoxy Resin
Before starting your project, gather all the necessary materials. Having everything ready will make the process easier and help you avoid rushing while your resin is still workable.
1. Clear Epoxy Resin and Hardener
Clear epoxy resin is the most important material for creating layered 3D effects. It provides a transparent foundation that allows decorative elements and colours to remain visible beneath the surface.
Choose a high-quality resin system suitable for your project. Art and coating resin generally works well for shallow decorative layers, while deep-pour epoxy is designed for thicker castings. Always check the manufacturer's recommended maximum pour depth before starting.
2. Resin Pigments and Colourants
Colour plays an important role in creating depth. You can use transparent dyes, epoxy-compatible pigment pastes, and mica powders to achieve different visual effects.
Popular colours for layered resin artwork include:
- Ocean blue and turquoise for underwater effects.
- Pearl white for clouds, waves, and soft highlights.
- Gold and silver for luxurious metallic details.
- Purple, pink, and dark blue for galaxy-inspired artwork.
- Emerald green and transparent yellow for nature-inspired designs.
For the most attractive results, experiment with transparent and opaque colourants in separate layers.
3. Mica Powder and Glitter
Mica powder adds a beautiful metallic or pearlescent appearance to epoxy resin. It reflects light and creates attractive highlights that make layered artwork look more interesting.
Fine glitter, metallic flakes, and decorative shimmer can also be added between layers. However, use them carefully because too much glitter can hide the details underneath.
4. Decorative Elements
Decorative inclusions are essential when you want to create realistic three-dimensional designs. Depending on your project, you can use:
- Pressed and completely dried flowers.
- Artificial leaves and small decorative plants.
- Seashells and small pebbles.
- Metallic flakes and foil.
- Small resin shapes and decorative charms.
- Glitter and coloured decorative particles.
Make sure all natural materials are completely dry and properly sealed before embedding them in resin. This helps reduce trapped air and unwanted moisture-related problems.
5. Essential Resin Tools
Along with your resin materials, you will need a few basic tools to achieve a smooth and professional finish.
- Accurate measuring cups or a digital scale, according to the resin manufacturer's instructions.
- Silicone mixing cups.
- Wooden or silicone stirring sticks.
- Silicone moulds or a suitable project surface.
- Disposable nitrile gloves.
- Protective eyewear.
- Tweezers for placing small decorative elements.
- A heat gun suitable for resin work, if recommended for your project.
- Fine sandpaper and polishing supplies for finishing.
How to Create 3D Effects in Epoxy Resin Step by Step
Now that you have your materials ready, it is time to create your own layered resin artwork. Follow these steps carefully to build beautiful depth and achieve a clean, glossy finish.
Step 1: Choose Your Design and Prepare the Workspace
Start by deciding what type of 3D resin artwork you want to create. You can make an ocean scene, a floral design, a colourful abstract piece, or a decorative resin coaster.
Think about how the finished artwork should look from different angles. Decide which colours will appear in the background, where decorative elements will be placed, and how many transparent layers you need.
Prepare a clean, dust-free, and level workspace. Cover the working surface with a protective sheet and arrange your tools and materials within easy reach.
A level workspace is especially important because uneven surfaces can cause resin to collect on one side, resulting in an inconsistent finish.
Step 2: Prepare and Seal Your Project Surface
If you are working with a silicone mould, make sure it is clean and completely dry before pouring resin.
For wooden boards, MDF, canvas, or other porous surfaces, apply a suitable sealer before adding the main resin layers. Porous materials can release trapped air into the resin, which may create bubbles and affect the finished appearance.
Allow the sealer to dry completely according to its instructions. This preparation step helps create a more even foundation for your layered design.
Step 3: Mix the Epoxy Resin Properly
Correct mixing is essential for achieving clear, durable, and properly cured resin layers. Read the manufacturer's instructions and measure the resin and hardener using the exact recommended ratio.
Mix slowly and thoroughly, scraping the sides and bottom of your mixing container to combine both components evenly. Avoid stirring too quickly because this can introduce unwanted air bubbles.
If your project requires different colours, divide the correctly mixed resin into separate cups and add small amounts of compatible pigments or mica powder.
Do not add excessive colourant because too much pigment can affect the curing process and reduce transparency. Always follow the colourant manufacturer's recommended usage limits.
Step 4: Pour the First Base Layer
The first layer creates the foundation of your 3D resin design. Depending on your chosen artwork, you can use clear resin, a lightly tinted colour, or an opaque background shade.
Pour a thin, even layer into your mould or over your prepared surface. Spread it gently if necessary, making sure the entire base is covered.
For a natural ocean effect, you might begin with a dark blue base. For floral artwork, a clear or soft-coloured background can help the flowers stand out.
Remove visible surface bubbles using a suitable method recommended for your resin system. Avoid applying excessive heat, as this can damage the mould or affect the curing process.
Step 5: Add Decorative Elements for a Floating Effect
This is where your artwork starts to develop its three-dimensional appearance. Once the first layer reaches the appropriate stage for embedding objects, carefully position your decorative materials.
You can use tweezers to place dried flowers, small shells, metallic flakes, or other decorations exactly where you want them.
For a floating flower effect, position the flowers slightly above the background layer instead of allowing them to rest directly on the bottom. A thin amount of clear resin can help hold them in place.
For an ocean-inspired design, arrange small shells or decorative stones at different positions to create the appearance of an underwater scene.
Make sure your decorative materials are suitable for resin embedding. Seal porous materials and check that no unwanted moisture or air is trapped around them.
Step 6: Pour the Second Layer of Clear or Coloured Resin
After positioning your decorative elements, prepare another batch of resin according to the manufacturer's instructions.
Pour the next layer slowly over the first layer and decorative materials. The transparent resin will cover the objects while allowing them to remain visible.
If you want a more dramatic effect, add a slightly different shade of colour to this layer. For example, combine a dark blue base with a transparent turquoise middle layer to create the appearance of deep ocean water.
Pay attention to the timing between pours. If you want to minimise visible layer lines, follow the resin manufacturer's recommended recoating or gel-stage instructions. If the previous layer has fully cured, it may need light sanding and cleaning before applying the next layer.
Step 7: Add More Layers to Increase the 3D Effect
For a stronger dimensional appearance, continue adding layers until you achieve your desired design. Each new layer provides an opportunity to introduce another colour, decorative element, or visual detail.
For example, you can use the following arrangement:
- First layer: Dark blue or another background colour.
- Second layer: Decorative shells, stones, or glitter.
- Third layer: Transparent turquoise resin to create depth.
- Fourth layer: Metallic details or additional decorative elements.
- Final layer: Clear epoxy resin to cover the artwork and create a glossy finish.
Remember that the number of layers depends on your design and the type of resin being used. You do not need to add too many layers to create an attractive 3D effect. A carefully planned combination of transparent and coloured resin can produce beautiful results.
Step 8: Create Special Effects with Pigments and Glitter
Once you understand the basic layering process, you can experiment with different decorative techniques.
Mica powder can create flowing metallic patterns, while transparent dyes can produce beautiful colour transitions. Fine glitter can add sparkle, and metallic foil can create luxurious highlights.
For an ocean-inspired project, use white resin pigment sparingly near the surface to create wave-like details. For galaxy artwork, combine dark blue, purple, and pink layers with small amounts of glitter.
Test new pigment combinations on a small sample before using them in your main project. This will help you understand how the colours look after curing.
Step 9: Allow the Resin to Cure Properly
Once all layers have been added, leave your project undisturbed in a clean, protected environment. Cover it with a suitable dust cover while allowing enough space for ventilation.
Curing time depends on the resin formula, room temperature, humidity, and thickness of the project. Follow the manufacturer's recommended curing schedule rather than assuming every layer will harden within the same amount of time.
Avoid moving, touching, or exposing the project to dust while it cures. Rushing this stage can affect the clarity, durability, and overall finish of your artwork.
Step 10: Demould and Polish Your Finished Resin Artwork
Once the resin has fully cured, carefully remove the project from the silicone mould if you are using one.
Inspect the surface and edges for imperfections. If necessary, use suitable sandpaper to smooth rough areas, followed by resin-compatible polishing products to achieve a glossy finish.
For projects that require additional surface protection or shine, apply a compatible clear topcoat according to the manufacturer's instructions.
Your layered epoxy resin artwork is now ready to display, use, or offer as a handmade product.
Creative 3D Epoxy Resin Layering Ideas to Try
Once you have mastered the basic technique, there are many creative designs you can explore. Here are some popular ideas that can help you make your resin projects more attractive.
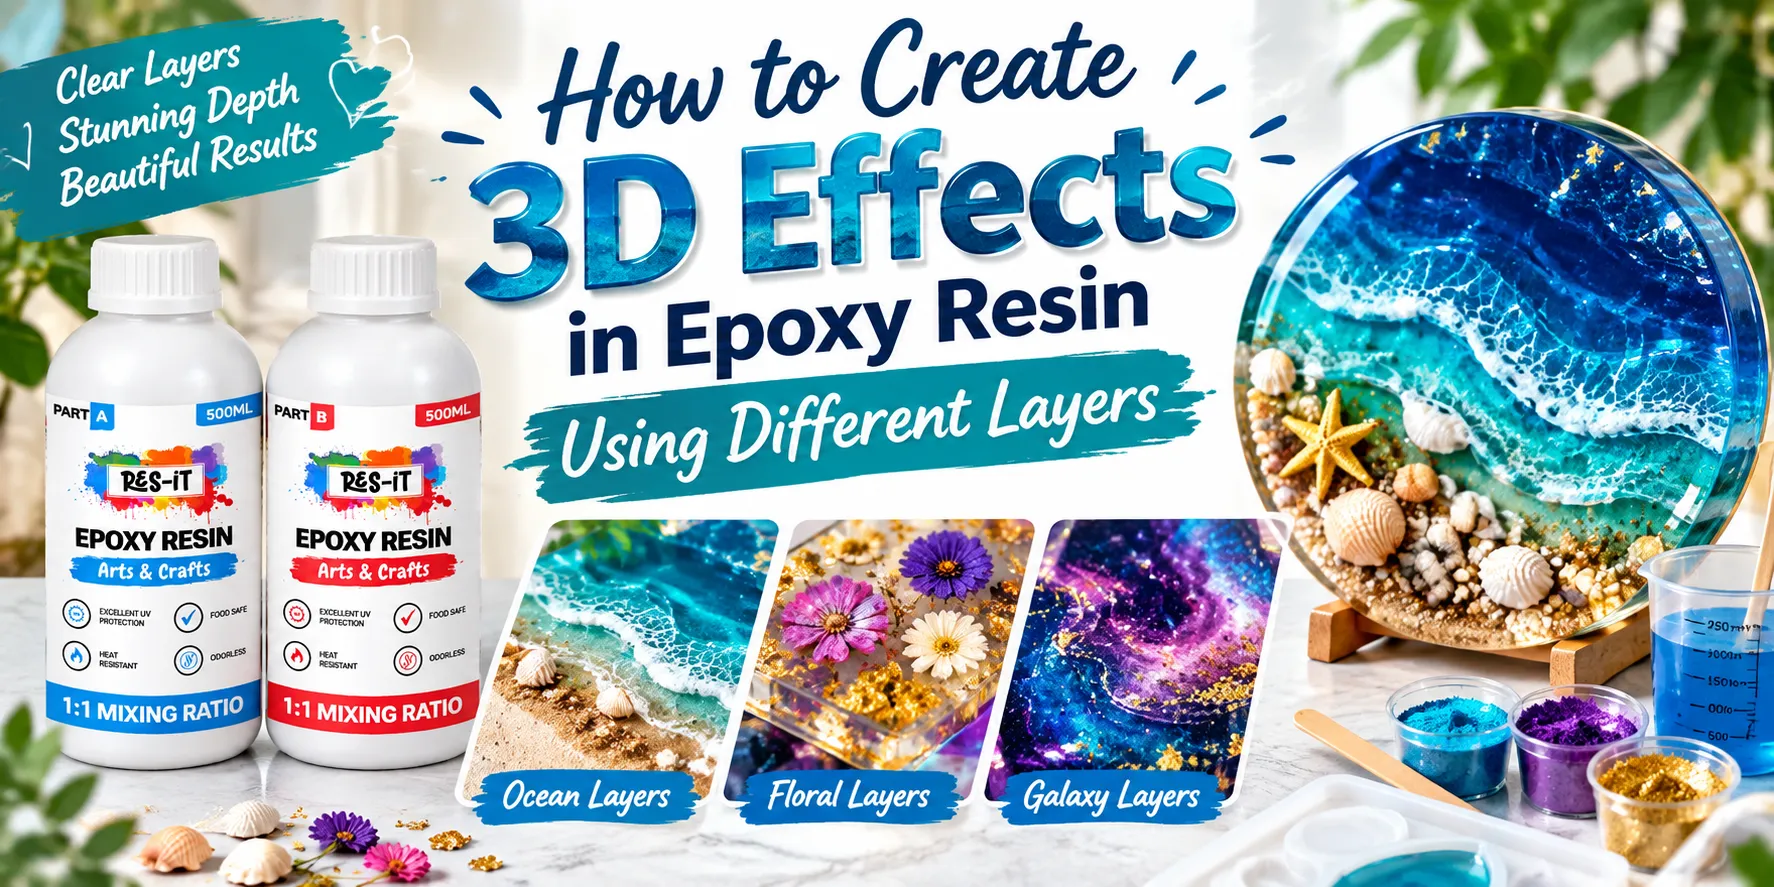
1. 3D Ocean Waves Resin Art
Ocean-inspired resin artwork is one of the most popular designs for layered epoxy projects. Combine dark blue, turquoise, and transparent resin to create the appearance of deep water.
Add small seashells, sand, and decorative stones to make the design more realistic. White pigment can be used to create wave-like details and beautiful ocean-inspired patterns.
This technique works particularly well for decorative trays, wall art, coasters, and tabletop designs.
2. 3D Dried Flower Resin Art
Dried flower resin art is a beautiful way to preserve floral decorations inside clear epoxy resin. By positioning different flowers between separate layers, you can create a floating garden effect.
Choose pressed flowers, small leaves, and delicate petals in complementary colours. Make sure they are fully dried and sealed before embedding them.
This technique is ideal for jewellery, paperweights, decorative blocks, and personalised gifts.
3. Galaxy-Inspired Layered Resin Art
Create a magical galaxy effect by combining dark blue, purple, pink, and black resin layers. Add fine glitter or metallic powder to represent distant stars and glowing cosmic details.
Use transparent resin between selected colour layers to create the illusion of depth. This design looks especially attractive in resin clocks, wall decorations, and decorative panels.
4. 3D Geode Resin Art
Geode-inspired resin artwork uses metallic colours, crystals, and contrasting pigments to recreate the appearance of natural gemstones.
Combine transparent resin with gold, silver, white, and coloured mica powders. Place decorative crystal-like stones or suitable resin embellishments at different levels to create a dimensional appearance.
This style is perfect for luxury-inspired wall art, serving trays, coasters, and decorative home accessories.
5. Glitter and Metallic Layered Resin Designs
If you love sparkling designs, experiment with glitter and metallic flakes. Create a dark or transparent base layer, add fine glitter in the next layer, and finish with clear resin.
Gold, rose gold, silver, and pearl effects can give your artwork an elegant appearance. This technique is especially useful for jewellery, keychains, bookmarks, and personalised gifts.
Common Mistakes to Avoid When Creating 3D Effects in Epoxy Resin
Layered resin art can be rewarding, but a few common mistakes can affect the final result. Understanding these problems before starting can save time, materials, and effort.
Using the Wrong Type of Epoxy Resin
Not every epoxy resin is designed for the same purpose. Using a thin coating resin for a deep casting project can lead to overheating, cracking, or other curing problems.
Always select a resin system suitable for your mould, project size, and required pour depth.
Adding Too Much Pigment
Excessive pigment can reduce transparency and interfere with proper curing. Add colourants gradually and stay within the manufacturer's recommended limits.
Pouring Layers Too Quickly
Adding a new layer before the previous one reaches the correct stage can cause colours to blend unexpectedly or decorative elements to move.
Follow the recommended recoat window for your resin system to achieve the desired separation between layers.
Ignoring Air Bubbles
Air bubbles can become trapped around decorative objects and affect the clarity of your finished project. Mix slowly, pour carefully, and use suitable bubble-removal techniques.
Not Preparing Decorative Materials
Moisture inside flowers, leaves, and other natural materials can cause unwanted bubbles or cloudy areas. Dry and seal these materials properly before embedding them.
Ignoring Safety Instructions
Always work in a well-ventilated area and follow the safety instructions provided with your resin products. Wear suitable nitrile gloves and protective eyewear, and avoid direct skin contact with uncured resin. Use appropriate respiratory protection when required by the product's safety information.
How to Choose the Best Epoxy Resin Supplies for Layered Artwork
The quality of your materials can make a significant difference in the appearance and durability of your finished project. If you want to create professional-looking 3D resin designs, invest in reliable supplies that match your specific requirements.
Here are some important things to consider when purchasing epoxy resin products:
- Crystal-clear epoxy resin: Choose a resin designed to provide the transparency required for layered decorative artwork.
- Deep-pour epoxy resin: Select a suitable deep-pour formula for projects that require greater casting depth.
- High-quality mica powders: Look for compatible pigments that provide attractive metallic and pearlescent effects.
- Resin colourants: Choose epoxy-compatible dyes and pigment pastes for consistent colour results.
- Silicone moulds: Reusable moulds in different shapes and sizes help you experiment with creative projects.
- Resin accessories: Measuring cups, mixing sticks, gloves, and finishing supplies make the working process easier.
Before purchasing, check the product specifications, mixing ratios, maximum pour depth, working time, and curing requirements. Selecting the correct materials can help you avoid unnecessary mistakes and achieve more predictable results.
Tips for Making Your 3D Epoxy Resin Projects Look More Professional
Small improvements in your working technique can make a noticeable difference in the final appearance of your resin artwork.
- Plan your design before mixing the resin so you know exactly where each colour and decorative element belongs.
- Use transparent resin strategically to make lower layers visible.
- Combine light and dark colours to create stronger visual contrast.
- Place decorative objects at different depths rather than keeping everything on one level.
- Use metallic powders and glitter in moderation to highlight important design details.
- Keep your workspace clean and level throughout the pouring process.
- Always respect the maximum pour depth recommended for your chosen epoxy resin.
- Test new colour combinations and techniques on small samples before working on larger projects.
- Allow sufficient curing time before demoulding, sanding, or polishing.
Frequently Asked Questions About 3D Effects in Epoxy Resin
1. How do you create a 3D effect in epoxy resin?
You can create a 3D effect by pouring epoxy resin in multiple layers and placing decorative materials, pigments, or glitter at different levels. Transparent resin between the layers allows the objects underneath to remain visible, creating an illusion of depth.
2. How many layers of epoxy resin are needed for a 3D effect?
Most decorative projects can achieve an attractive 3D appearance with two or more layers. The exact number depends on your design, the depth of the mould, and the maximum pour thickness allowed by your resin system.
3. Can you put glitter between epoxy resin layers?
Yes, glitter can be added between epoxy resin layers to create sparkling and decorative effects. Fine glitter is particularly useful for galaxy-inspired designs, jewellery, coasters, and decorative trays.
4. Can dried flowers be placed between resin layers?
Yes. Completely dried and properly sealed flowers can be embedded between resin layers. This technique creates a beautiful floating floral appearance and is commonly used for jewellery, paperweights, and decorative gifts.
5. How long should I wait before adding another layer of epoxy resin?
The waiting time depends on your specific epoxy resin formula, room temperature, and project thickness. Some systems allow another layer during a recommended tacky or gel stage, while others require the previous layer to cure fully before recoating. Always follow the manufacturer's instructions.
6. Why does my layered epoxy resin look cloudy?
Cloudiness can result from moisture, incompatible colourants, excessive pigment, trapped air, or incorrect mixing. Using suitable materials, following the correct mixing ratio, and preparing decorative objects properly can help prevent these issues.
7. Can beginners create 3D resin artwork?
Absolutely! Beginners can start with small projects such as coasters, bookmarks, keychains, and decorative moulds. These projects are easier to manage and provide an opportunity to practise mixing, pouring, layering, and finishing techniques.
8. Which epoxy resin is best for layered 3D projects?
The best option depends on your project. Art and coating epoxy is suitable for many shallow decorative applications, while deep-pour epoxy is designed for thicker castings. Always check the product's intended use and maximum pour depth before purchasing.
9. How can I prevent visible lines between epoxy resin layers?
Follow the manufacturer's recommended recoating window. Applying a new layer during the appropriate tacky stage may help reduce visible seams. If the previous layer has fully cured, light sanding and thorough dust removal may be necessary before applying the next coat.
Final Thoughts: Start Creating Beautiful 3D Effects with Epoxy Resin
Creating 3D effects in epoxy resin using different layers is a fantastic way to transform ordinary resin projects into beautiful and eye-catching artwork. By combining clear resin, colourful pigments, glitter, dried flowers, and decorative elements, you can create designs that look deeper, more detailed, and more professional.
The key is to understand how layering works, choose the correct resin for your project, prepare your materials properly, and allow every layer to cure according to the manufacturer's instructions.
Whether you are a beginner exploring resin art for the first time or an experienced artist looking for new creative techniques, layered epoxy resin offers endless possibilities. Start with a simple design, experiment with different colour combinations, and gradually develop your own unique style.
Ready to bring your creative ideas to life? Explore our collection of high-quality epoxy resin, mica powders, pigments, silicone moulds, and resin art accessories. Find the right supplies for your next project and start creating stunning 3D resin artwork today!