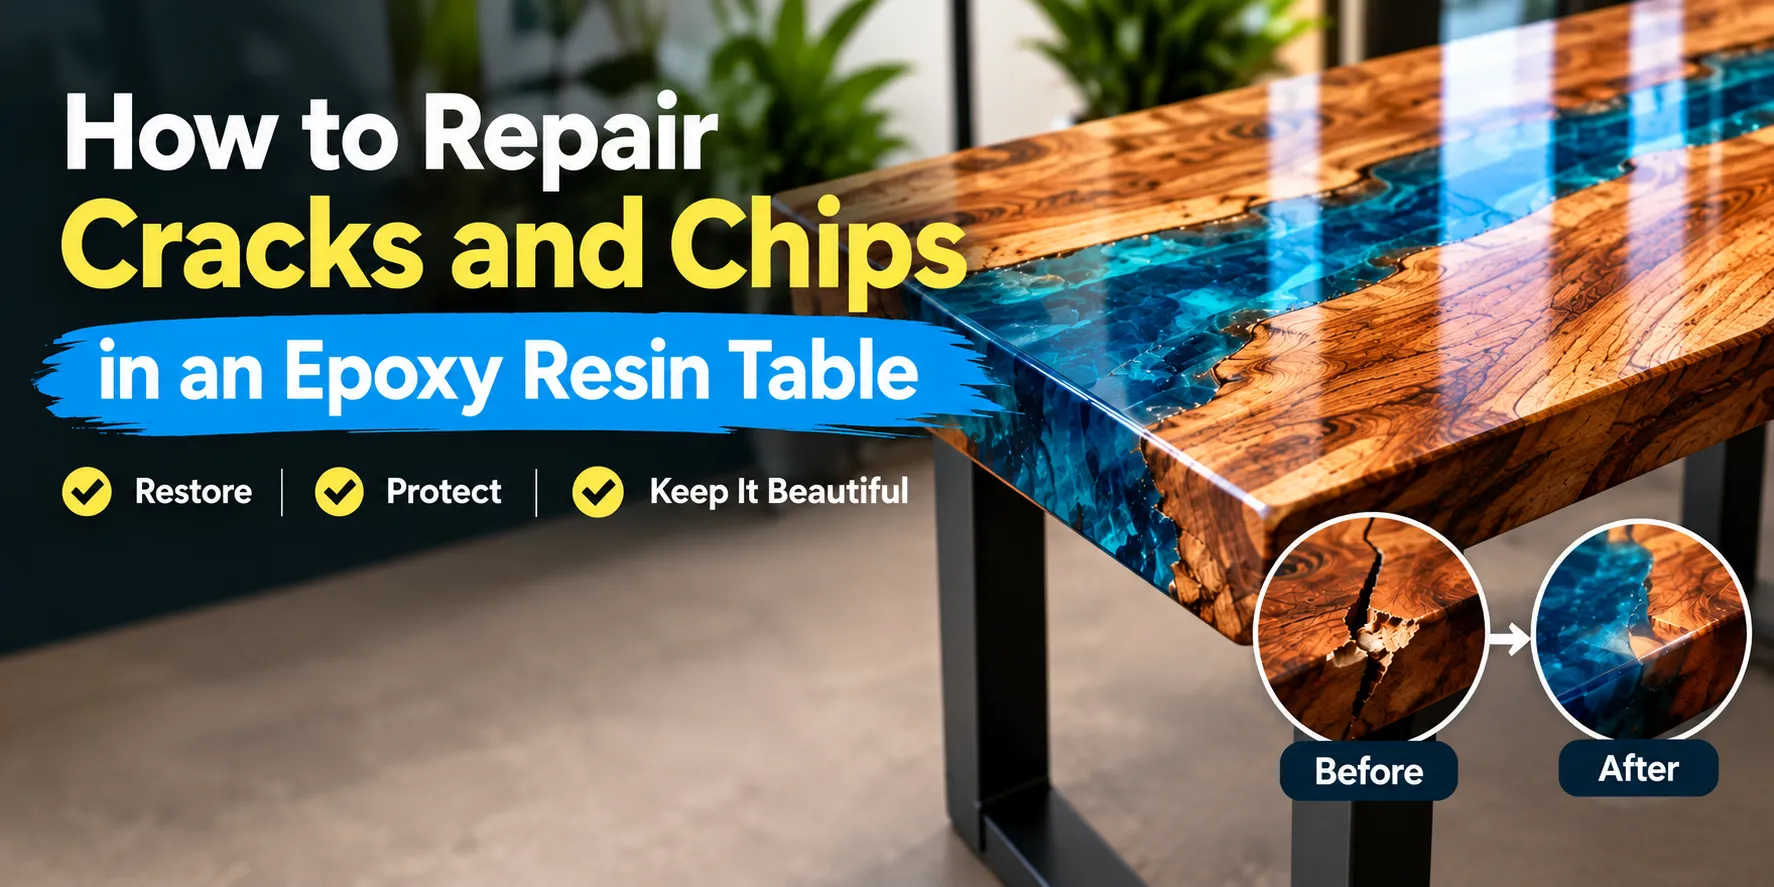
How to Repair Cracks and Chips in an Epoxy Resin Table
Epoxy resin tables are popular for their glossy appearance, unique designs and ability to combine natural wood with beautiful resin effects. From river tables and dining tables to coffee tables and decorative furniture, a well-made epoxy table can become the centrepiece of any room. However, everyday use, accidental impacts, excessive heat or problems during the original application can sometimes leave cracks, chips or damaged edges.
The good news is that many damaged epoxy resin tables can be repaired without replacing the entire surface. The right repair method depends on the depth of the crack, the size of the chip and whether the damage affects the resin coating, the underlying wood or the table's structure.
In this guide, we explain how to repair cracks and chips in an epoxy resin table, how to fill damaged areas with fresh resin, when sanding and recoating are necessary, and how to restore a smooth, glossy finish. You will also learn how to prevent future damage and choose suitable epoxy resin products for your next furniture project.


Res-iT Epoxy Resin 240ml Starter Kit
Can You Repair Cracks and Chips in an Epoxy Resin Table?
Yes, many cracks, chips and surface imperfections in an epoxy resin table can be repaired. Small chips and shallow cracks are often suitable for a local repair, while extensive damage may require sanding and applying a new resin coating.
Before starting, it is important to understand what has been damaged. A scratch in the clear topcoat is different from a crack running through a thick resin river, and a loose section of wood requires a different repair approach from a small chip along the table edge.
- Minor surface scratches: These may be improved through careful sanding and polishing, depending on their depth.
- Small chips: Missing material can often be filled with compatible epoxy resin and finished to match the surrounding surface.
- Shallow cracks: Stable cracks may be cleaned, prepared and filled with suitable resin.
- Deep cracks: These need closer inspection to determine whether the damage extends through the resin or into the wood.
- Widespread surface damage: Sanding and applying a compatible new coating may provide a more consistent appearance.
- Structural cracks: Cracks affecting the table's strength or stability may require woodworking repairs or professional assessment before cosmetic resin work begins.
Repairing the cause of the damage is just as important as improving its appearance. If the wood is moving, the table base is unstable or the original resin has separated from the substrate, simply filling the visible crack may not provide a lasting solution.
What Causes Cracks and Chips in Epoxy Resin Tables?
Understanding why a table has cracked or chipped helps you choose the correct repair and reduce the chance of the same problem happening again.
1. Accidental Impacts and Everyday Wear
Dropping a heavy object, striking a table edge or moving furniture carelessly can chip cured epoxy resin. Edges and corners are particularly vulnerable because impacts are concentrated in a relatively small area.
2. Excessive Heat During Use
Hot pans, heated appliances and other sources of concentrated heat can damage an epoxy tabletop. Depending on the resin formulation and exposure, heat may soften, discolour or weaken the surface. Severe temperature changes can also contribute to stress in the resin or its bond with the wood.
Always follow the manufacturer's heat-resistance guidance and use suitable heat-resistant mats or trivets.
3. Incorrect Resin Mixing
Using the wrong resin-to-hardener ratio or mixing the components inadequately can result in an improperly cured surface. Resin that has not cured correctly may remain soft, become brittle or fail to perform as expected.
For future projects, measure the components according to the manufacturer's specified ratio. Some systems use a 1:1 ratio, while others use different proportions, so never assume that every epoxy product is mixed in the same way.
4. Incorrect Pouring Depth or Excessive Heat Build-Up
Pouring a resin formulation beyond its recommended thickness can create excessive heat during curing. This may cause discolouration, internal stress, cracks or other defects. Deep river tables and thick castings require a resin specifically designed for the intended pour depth.
5. Movement in the Wood
Wood naturally responds to changes in temperature and moisture. If the wood expands or contracts while the resin remains comparatively rigid, stress can develop around the interface. Poor preparation, unsuitable construction methods or an unstable tabletop can increase the risk of cracking or separation.
6. Poor Surface Preparation or Adhesion
Dust, grease, moisture or an inadequately prepared surface can interfere with the bond between epoxy resin and the substrate. If the resin begins lifting or separating, the repair must address the loose material and the underlying adhesion problem rather than simply covering it with another coat.
Tools and Materials Needed for Epoxy Table Repair
Gathering your materials before starting makes the repair more manageable and helps you avoid contaminating the prepared surface halfway through the process.
- Compatible epoxy resin suitable for the type of repair.
- The correct hardener supplied or specified for that resin system.
- Accurate measuring equipment, such as a digital scale when the instructions specify weighing.
- Clean mixing cups and suitable mixing stirrers.
- Fine and medium-grit sandpaper appropriate for the damage.
- A sanding block or suitable sander for larger flat areas.
- A small spatula, applicator or suitable tool for placing resin into chips.
- Masking tape or suitable temporary barriers to contain liquid resin.
- A clean, lint-free cloth and an approved cleaning method.
- Suitable gloves, safety glasses and respiratory protection for the task.
- Polishing compound and compatible polishing pads if a glossy finish needs restoring.
For small decorative repairs, a carefully measured amount of compatible resin may be sufficient. For large river tables or deeper defects, you must select a product suitable for the depth and volume involved.
Always read the technical data sheet and safety information for your chosen resin. Avoid using a deep-pour resin for a thin surface repair unless the manufacturer confirms that it is suitable for that application.
How to Repair Cracks in an Epoxy Resin Table Step by Step
For a stable crack that does not compromise the table's structure, a carefully prepared resin repair may restore the surface. The following method is intended for suitable cosmetic damage rather than major structural failures.
Step 1: Inspect the Crack and Identify Its Cause
Examine the crack under good lighting. Check whether it is limited to the top coating or continues deeper into the resin or wood. Look for loose material, movement, moisture, discolouration or signs that the resin has separated from the substrate.
If the crack extends through the tabletop, the wood is split, or the table feels unstable, resolve the underlying structural issue before attempting a cosmetic repair. A surface fill alone will not reliably restore structural strength.
Step 2: Clean and Prepare the Damaged Area
Remove loose dirt and debris from the crack. If the surrounding resin is flaking or separating, carefully remove material that is no longer securely bonded, taking care not to enlarge the damaged area unnecessarily.
Use suitable abrasives to prepare the repair area according to the resin manufacturer's instructions. The aim is to create a clean, stable surface that allows the new material to bond properly.
- Remove loose fragments and unstable resin.
- Sand the damaged edges carefully where necessary.
- Remove dust using a suitable vacuum or clean, lint-free cloth.
- Use only a cleaning product approved for the surface and resin system.
- Allow the area to become completely dry before applying fresh resin.
Do not allow sanding dust, oil or moisture to remain inside the crack. Contamination can interfere with adhesion and affect the appearance of the repair.
Step 3: Seal or Contain the Crack if Necessary
If the crack passes through the resin or opens into a space beneath the surface, fresh resin may escape before it cures. Use suitable masking materials or a temporary barrier to contain the repair, ensuring that the barrier itself will not contaminate the bonding surface.
For a deep crack, check whether the resin is appropriate for the cavity's depth and volume. Some defects are better repaired in controlled stages rather than by filling the entire space at once.
Step 4: Measure and Mix the Epoxy Resin Correctly
Measure the resin and hardener using the exact mixing ratio specified by the manufacturer. If the product specifies a ratio by weight, do not substitute a volume-based measurement.
Mix slowly and thoroughly, scraping the sides and bottom of the container as directed. Avoid introducing unnecessary air bubbles, and use a clean container and suitable stirrer.
Accurate measuring is especially important when preparing a small repair batch. Incorrect proportions can leave the repair soft, tacky or unsuitable for sanding and polishing.
Step 5: Fill the Crack with Compatible Resin
Apply the mixed resin carefully, allowing it to reach the prepared crack or cavity. Use a suitable applicator to guide the material into the damaged area without spreading unnecessary resin across the surrounding tabletop.
For a clear tabletop, compatible clear resin may help preserve the original appearance. For coloured resin, a compatible pigment may be needed to match the existing design. However, colour matching can be difficult, especially when the original resin contains layered pigments, metallic effects or a distinctive river pattern.
- Apply only the amount required to fill the prepared area.
- Check that the crack is filled without leaving obvious voids.
- Follow the product's instructions for working time and bubble management.
- Keep the repair level and contained while the resin cures.
- Avoid adding excessive heat to remove bubbles, as this can damage the existing resin or wood.
Step 6: Allow the Repair to Cure Fully
Leave the repair undisturbed for the curing period specified by the manufacturer. The required time depends on the resin formulation, temperature, repair thickness and environmental conditions.
Do not sand or polish the repair while the resin is still soft. Premature finishing can cause smearing, unevenness or poor results.
Step 7: Sand and Blend the Repaired Area
Once the repair has reached the required cure, carefully level any excess resin. Start with an appropriate abrasive for the amount of material that needs removing, then progress through finer grits to reduce the sanding marks.
Work gradually and check the surface frequently. Avoid sanding too aggressively near the edges of the repair, as this can create dips or expose the underlying wood.
Step 8: Polish or Recoat to Restore the Finish
After sanding, decide whether the repair can be blended locally or whether the entire tabletop needs a new compatible coating. Small repairs may be polished if the surrounding surface and repair material can achieve a consistent finish.
For a larger repair, a properly prepared and compatible new coating may provide a more uniform appearance. Follow the resin manufacturer's surface preparation, application and curing instructions before returning the table to use.
For additional finishing advice, see our guide: How to Polish Epoxy Resin to a High Gloss Finish.
How to Fix Chips in an Epoxy Resin Table
Chips commonly appear along the corners, edges and exposed surfaces of epoxy tables. The best repair method depends on the size of the missing section and whether the chip exposes wood underneath.
Repairing Small Chips
Small, shallow chips can often be repaired with a compatible epoxy resin. After removing loose fragments and preparing the area, apply the resin carefully and allow it to cure before sanding and finishing.
- Clean the chipped area and remove loose material.
- Prepare the edges so that no unstable resin remains.
- Contain the resin if the chip is near an edge.
- Mix a small batch of suitable epoxy according to the instructions.
- Fill the missing section carefully without trapping debris.
- Allow the repair to cure completely.
- Sand the excess material level and restore the finish.
Repairing Chips Along Table Edges
Edge chips require extra care because liquid resin can run away from the damaged area. A suitable temporary barrier can help retain the material until it cures.
Prepare the damaged edge carefully and ensure that the new resin bonds to stable, clean material. Once cured, shape the repair gradually and finish the edge to match the surrounding tabletop.
If the chip has removed a substantial piece of wood or weakened a joint, a woodworking repair may be necessary before applying resin.
Repairing Large or Deep Chips
Large cavities may need a resin system specifically suitable for the repair depth. Do not fill a deep cavity with a product designed only for thin coatings if the manufacturer does not recommend that use.
Depending on the damage, a staged fill, a compatible insert or a combined wood-and-resin repair may be more appropriate. For deep defects in a valuable or structurally important table, consider obtaining professional advice before proceeding.
Should You Repair the Damaged Spot or Recoat the Entire Table?
One of the most important decisions is whether to carry out a local repair or apply a new coating across the whole tabletop. Both methods can work, but the condition of the existing surface should guide your choice.
When a Local Repair Is Suitable
- The crack or chip is small and clearly defined.
- The surrounding resin remains firmly bonded.
- The underlying tabletop is stable and dry.
- The repair can be blended without creating an obvious patch.
- The colour and finish can be matched closely enough for the intended result.
When Recoating the Table May Be Better
- The surface has widespread scratches, chips or cosmetic damage.
- Several repairs would otherwise leave visible differences in gloss.
- The existing coating is worn but the underlying structure remains sound.
- The repaired areas need a consistent finish across the entire surface.
Before recoating, remove loose or poorly bonded material, prepare the existing surface as specified by the manufacturer, and ensure that it is clean and dry. If sanding exposes bare wood, follow the recommended preparation and sealing process for the selected resin system.
Do not simply pour fresh epoxy over an unstable or contaminated surface. A new layer cannot reliably correct poor adhesion beneath it.
Which Epoxy Resin Is Best for Repairing a Table?
The best resin depends on the type of damage. A thin tabletop repair, a small chip and a deep river-table cavity may require different products. Consider the intended thickness, working time, clarity, colour requirements and curing conditions before choosing a kit.
Epoxy Resin for Small Repairs and Decorative Projects
For suitable small repairs, a compatible resin kit may provide enough material to fill a shallow chip or crack. Choose a product whose application instructions support the intended use and repair thickness.
The Res-iT 4L Pro Kit may be an option for makers who need a larger quantity of resin for appropriate coating and decorative projects. Always check its current specifications and ensure it is suitable for the repair you are planning.
Deep Pour Resin for Larger Cavities and River Tables
Deep-pour resin is designed for thicker castings within the manufacturer's specified limits. It may be appropriate for some larger woodworking and river-table projects, but it should not automatically be treated as the best choice for a thin surface repair.
The Res-iT 3L Deep Pour Starter Kit is worth considering for compatible deep-pour projects and smaller castings where its specifications meet the requirements.
For a larger repair, compare the depth of the cavity with the maximum recommended pour thickness. If the repair is a shallow topcoat rather than a deep casting, select a resin intended for that type of application.
Useful Mixing and Safety Accessories
Accurate measuring, thorough mixing and suitable protective equipment help you prepare resin consistently and work more safely.
- Digital weighing scale: Useful when the selected product specifies a weight-based mixing ratio.
- Measuring cups and mixing stirrers: Help keep the preparation process organised.
- Nitrile gloves: Provide a barrier when used according to the product safety guidance.
- Suitable respiratory protection: Helps protect against sanding dust and other identified airborne hazards.
Use the correct protective equipment for the specific task. Gloves alone do not protect against inhalation, and sanding cured resin requires appropriate dust control and respiratory protection.
Common Mistakes to Avoid When Repairing an Epoxy Table
Using the Wrong Resin
Not every epoxy formulation is suitable for every repair. A resin designed for thick castings may behave differently from one intended for a thin surface coating. Check the product specifications before applying it.
Filling a Crack Without Preparing It
Applying fresh resin over dust, loose fragments or contamination can result in poor adhesion. Prepare the damaged area thoroughly and remove all loose material before filling.
Mixing Resin in the Wrong Ratio
Incorrect proportions can affect curing and the final performance of the repair. Follow the exact instructions for the chosen resin rather than estimating the amounts.
Sanding Before the Resin Has Cured
Premature sanding can smear the material or damage the repair. Allow sufficient curing time under the recommended conditions.
Applying Too Much Heat
Excessive heat from a heat gun, torch or polishing machine can damage existing resin, cause discolouration or create additional stress. Follow the manufacturer's instructions and avoid concentrating heat in one place.
Ignoring Structural Damage
A cosmetic resin fill will not necessarily stabilise a cracked wood joint or a split tabletop. Address the underlying structural problem before attempting to restore the appearance.
How to Prevent Cracks and Chips in Epoxy Resin Tables
Good care and careful construction can help reduce the risk of future damage. Although no epoxy surface is completely immune to impacts or wear, a few simple habits can make a difference.
- Use heat-resistant mats or trivets for hot cookware and appliances.
- Avoid dropping heavy objects onto the resin surface.
- Use coasters and protective pads to reduce scratches.
- Clean the table with a soft cloth and a suitable mild cleaning solution.
- Avoid abrasive cleaners and chemicals that are not approved for the finish.
- Keep the tabletop and supporting structure stable.
- Follow the resin manufacturer's curing and temperature recommendations.
- Measure and mix resin accurately during the original project.
- Choose the correct resin formulation for the required casting depth.
- Protect the finished table from excessive environmental changes where practical.
For new river-table projects, preparation is particularly important. Use properly prepared wood, a stable mould and a resin system designed for the intended pour depth. These steps help reduce avoidable defects before the finishing process even begins.
Frequently Asked Questions About Epoxy Resin Table Repairs
Can you fix a cracked epoxy resin table without replacing it?
Yes, many cracks can be repaired if the surrounding resin and underlying structure remain sound. Small cracks may be filled with compatible epoxy, while larger or structural cracks may require additional repairs before the surface is refinished.
How do you fill a chip in an epoxy resin tabletop?
Remove loose material, prepare and clean the damaged area, contain the resin if necessary, and fill the chip with a compatible epoxy. Allow it to cure fully, then sand and finish the repair to match the surrounding surface.
Can you put new epoxy resin over old epoxy resin?
In many cases, yes, provided the old coating is stable and compatible with the new resin. The surface normally needs suitable abrasion, thorough cleaning and complete drying. Follow the manufacturer's recoat instructions and do not cover loose, peeling or contaminated material.
Will a repaired epoxy crack be visible?
It depends on the size of the crack, the colour and clarity of the resin, the surrounding design and the quality of the repair. Small repairs in clear resin may blend well, but matching metallic pigments, coloured rivers and complex wood patterns can be challenging.
Can you repair a deep crack in an epoxy river table?
Some deep cracks can be repaired, but the cause and extent of the damage must be assessed first. A deep crack that affects the wood, the resin's bond or the structural integrity of the table may require professional assessment and more than a simple resin fill.
How long does epoxy resin take to cure after a repair?
Curing time varies according to the product, temperature, thickness and environmental conditions. Follow the manufacturer's instructions for sanding, polishing and returning the table to normal use. Do not assume that a surface that feels dry has reached its full cure.
Can you sand and polish a repaired epoxy resin table?
Yes, once the repair has reached the required cure. Sand the excess resin level, progress through suitable finer abrasives and use a compatible polishing compound or coating system to restore the desired finish.
Should I repair a chip or apply a new coating?
A small, isolated chip may be suitable for a local repair. If the tabletop has widespread damage or several visible patches, preparing the surface and applying a compatible new coating may provide a more uniform finish.
Restore Your Epoxy Resin Table with the Right Repair Method
Cracks and chips do not always mean that an epoxy resin table needs to be replaced. With careful inspection, correct surface preparation and a compatible repair material, many minor defects can be repaired and the table's appearance restored.
The key is to identify the cause of the damage, choose a repair method that matches its depth and extent, and allow the resin to cure properly before sanding or polishing. Structural cracks and unstable wood need particular attention because a cosmetic fill alone may not provide a lasting repair.
If you are planning a new resin project or need suitable materials for compatible repairs, explore the Res-iT epoxy resin kits and deep-pour resin range. Choosing the right product for your application, measuring accurately and following the manufacturer's instructions will help you work towards a smooth, professional-looking result.