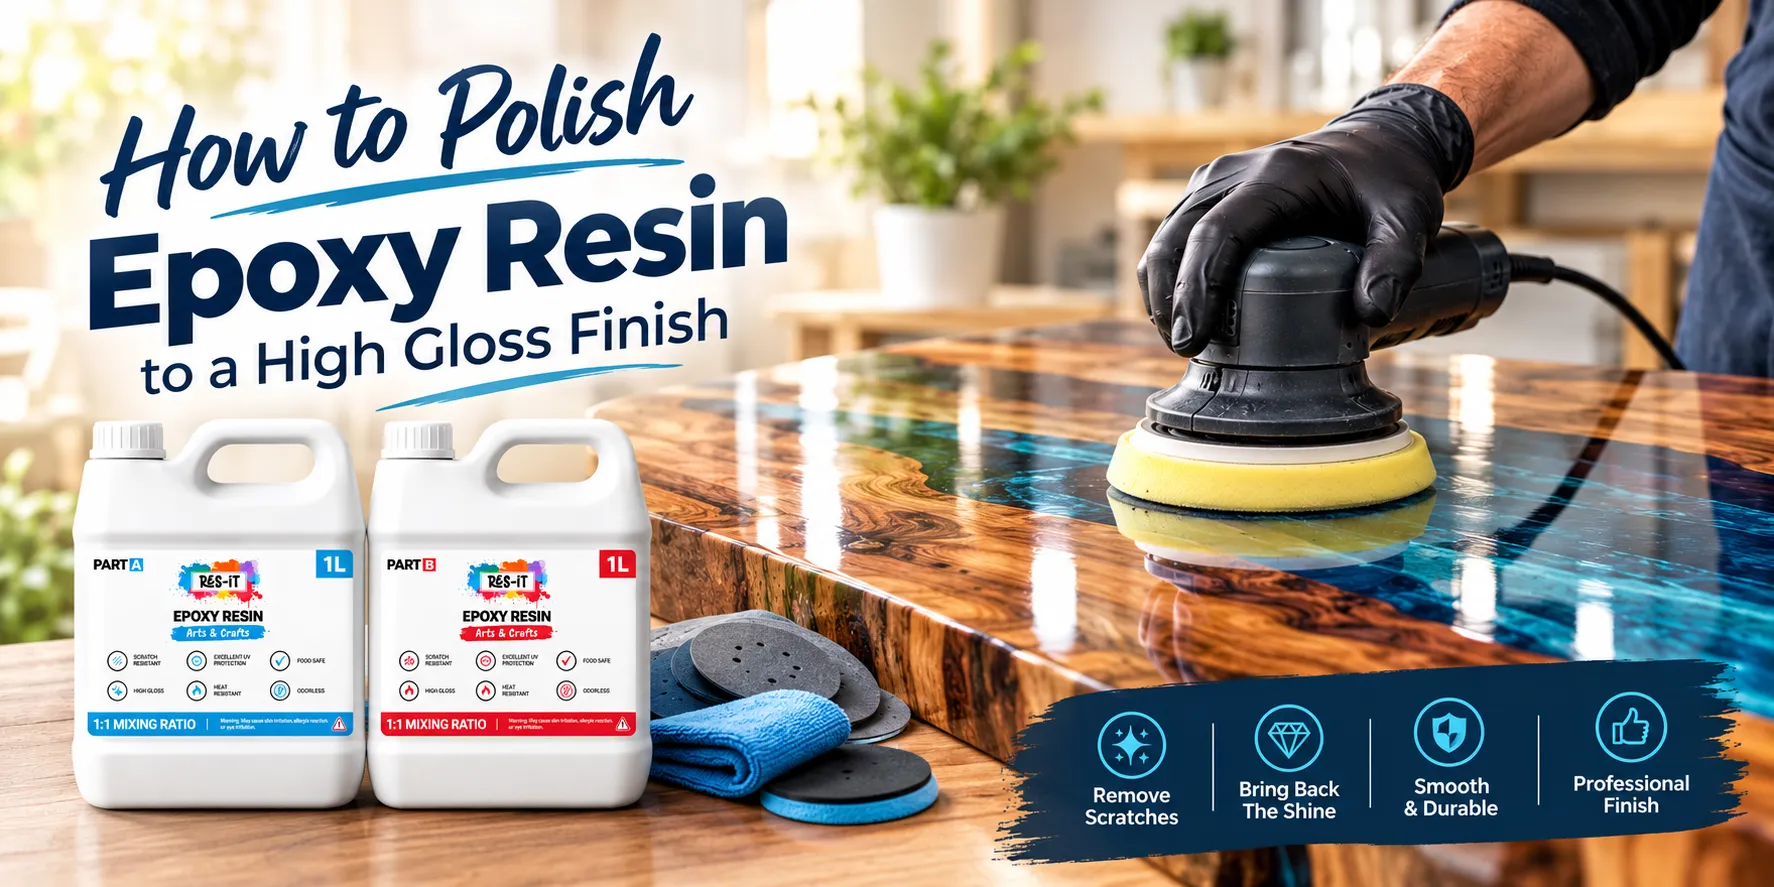
How to Polish Epoxy Resin to a High Gloss Finish
A beautiful epoxy resin project deserves a finish that shows off every detail. Whether you have created a river table, a decorative tray, handmade jewellery or a colourful resin casting, a smooth, glossy surface can make the finished piece look far more professional. However, even a carefully poured project can develop minor scratches, sanding marks or cloudy patches that affect its appearance.
The good news is that learning how to polish epoxy resin to a high gloss finish is easier when you understand the process. With the right preparation, progressively finer sandpaper and a suitable polishing compound, you can improve the clarity and shine of fully cured resin without starting your project again.
In this guide, we explain how to polish epoxy resin step by step, which sanding grits to use, how to remove surface scratches and which tools can help you achieve a smooth finish. We also cover common mistakes and practical tips for getting better results from your next resin project.


Res-iT Epoxy Resin 480ml Starter Kit

Res-iT Epoxy Resin 1L Starter Kit
Can You Polish Epoxy Resin to a High Gloss Finish?
Yes, fully cured epoxy resin can be sanded and polished to achieve a smooth, high-gloss finish. The best method depends on the condition of the surface, the type of resin used and the size of the project.
If your resin is already smooth but has lost some of its shine, a suitable polishing compound may be enough to improve its appearance. However, deeper scratches, uneven areas and noticeable sanding marks usually need to be corrected before polishing begins.
The secret is to work gradually. Sanding removes surface imperfections, while finer abrasives reduce the scratches left by coarser sandpaper. Polishing then refines the surface and restores its shine.
- Small resin crafts: Hand sanding and polishing are often sufficient for jewellery, coasters and decorative pieces.
- Resin trays and moulded decorations: Fine sanding and a suitable polishing compound can improve clarity and smoothness.
- River tables and furniture: Larger surfaces may benefit from a suitable machine polisher and a carefully controlled finishing process.
- Lightly scratched resin: A fine polish may restore the appearance without extensive sanding.
What You Need to Polish Epoxy Resin
Before starting, gather your materials and prepare a clean working area. Having the correct tools available makes the process easier and reduces the risk of introducing new scratches while finishing your project.
- Wet-and-dry sandpaper in progressively finer grits.
- A sanding block for flat surfaces and controlled hand sanding.
- A polishing compound suitable for cured epoxy resin or hard plastics.
- Clean microfibre cloths.
- A suitable foam polishing pad or compatible polishing machine for larger projects.
- Clean water for wet sanding, where appropriate for the resin and workpiece.
- Good lighting to inspect scratches, dull patches and uneven areas.
- Safety glasses and suitable respiratory protection for sanding dust.
- Nitrile gloves for handling polishing products and protecting your hands.
For resin projects, accurate measuring and thorough mixing also matter long before polishing begins. Res-iT measuring cups, mixing stirrers and a digital weighing scale can help you organise your materials and work more consistently when preparing resin. Always follow the mixing ratio specified for your chosen kit.
Safety tip: Sand only after the resin has reached the required cure specified by its manufacturer. Wear appropriate respiratory protection, control dust and keep your workspace ventilated. Never use water with electrical equipment unless the equipment and working method are specifically designed for it.
Step 1: Make Sure the Epoxy Resin Is Fully Cured
One of the most important steps in epoxy resin polishing is allowing the material to cure properly. Resin may feel dry on the surface before it has reached the hardness required for sanding and polishing.
Working on resin that is still soft can lead to smearing, clogged sandpaper, uneven patches and a disappointing finish. Applying too much pressure to incompletely cured resin can also damage the surface.
Check the technical instructions supplied with your epoxy resin kit for the recommended curing time and temperature. The time required can vary depending on the formulation, room conditions, casting depth and size of the project.
Before moving forward, check that:
- The surface is no longer sticky.
- The resin has reached the manufacturer's recommended cure for finishing.
- There are no obvious soft or flexible areas that indicate incomplete curing.
- The project is stable enough to handle without damaging its edges or details.
If you are working on a deep-pour river table or a thick decorative casting, allow for the longer cure requirements specified for that particular resin system.
Step 2: Clean the Surface and Inspect for Imperfections
Once the resin is fully cured, inspect the surface under bright, angled lighting. This helps you identify scratches, raised edges, small drips, dust marks and uneven areas that may not be obvious under normal lighting.
Remove loose dust using a clean, soft cloth. Make sure the workpiece is free from grit and other particles that could scratch the resin during sanding.
Look closely at the areas that need attention. A lightly hazy surface requires a different approach from a deep scratch or a noticeably uneven tabletop.
- For minor dullness, start with a suitable fine polishing method.
- For shallow scratches, choose an appropriate fine or medium abrasive.
- For uneven surfaces, use a suitable levelling method before moving through finer grits.
- For deep defects, assess whether the surface can be safely corrected without removing too much material.
Always begin with the least aggressive method that is likely to solve the problem. This helps preserve the thickness of the resin and avoids unnecessary sanding.
Step 3: Sand the Epoxy Resin Using the Correct Grits
Sanding is the stage that makes the biggest difference to the final result. It removes surface imperfections and prepares the resin for polishing. However, sanding will initially make a clear epoxy surface look cloudy or matte. This is normal and does not necessarily mean the resin has been damaged.
For a surface that is already reasonably level, a typical finishing sequence might be 400, 600, 800, 1000, 1500, 2000 and 3000 grit. The starting grit should be selected according to the depth of the imperfections, and a rougher surface may need additional intermediate stages.
Choosing the Right Sandpaper for Epoxy Resin
- 120–240 grit: For carefully controlled levelling of more substantial defects. These coarse grits can leave deep scratches and should not be used unnecessarily.
- 400–600 grit: For removing lighter surface imperfections and beginning a finer finishing sequence.
- 800–1000 grit: For refining the scratches left by the previous stage.
- 1500–2000 grit: For reducing visible sanding marks and preparing the surface for polishing.
- 2500–3000 grit or finer: For further refining the surface before applying a suitable polishing compound.
These grit ranges are a general guide rather than a universal requirement. The appropriate starting point depends on the resin system, the defect and the abrasive manufacturer's recommendations.
How to Sand Epoxy Resin Correctly
- Secure the project so it cannot move while you work.
- Begin with the finest abrasive that can remove the imperfections effectively.
- Sand evenly, using controlled pressure and overlapping movements.
- Keep the sanding pattern consistent across the area you are treating.
- Remove the sanding residue and inspect the surface before changing grits.
- Move to the next finer grit only after the previous scratches have been removed.
- Repeat the process until the surface is uniformly refined and ready for polishing.
Do not skip sanding stages simply to save time. Coarse scratches can remain visible after polishing if the finer abrasives have not removed them properly.
For flat resin tables, a suitable sanding block or compatible random-orbit sander can help maintain an even surface. For jewellery, curved castings and intricate decorations, controlled hand sanding is often easier.
Step 4: Should You Wet Sand or Dry Sand Epoxy Resin?
Both wet sanding and dry sanding can be useful when finishing epoxy resin. The right choice depends on the abrasive, the project and the manufacturer's recommendations.
Wet Sanding
Wet sanding uses water with suitable wet-and-dry abrasives. It can help reduce airborne dust, prevent abrasive clogging and create a more controlled finishing process.
- Use abrasives specifically designed for wet sanding.
- Keep the surface appropriately lubricated throughout the process.
- Rinse away residue and inspect the finish between sanding stages.
- Dry the workpiece thoroughly before applying polishing compound.
Wet sanding is particularly useful during finer finishing stages when the surface is already level. However, it is not suitable for every workpiece or every sanding setup.
Dry Sanding
Dry sanding can be useful for levelling defects and preparing larger surfaces. It requires effective dust extraction and appropriate respiratory protection because cured epoxy dust should not be inhaled.
Use suitable abrasives, avoid excessive pressure and allow the surface to cool if it begins to heat up. Do not continue sanding if the resin starts to smear, soften or show signs of heat damage.
Whichever method you choose, clean the workpiece thoroughly between grits. A single coarse particle left on the surface can create scratches that are difficult to remove later.
Step 5: Apply a Suitable Epoxy Resin Polishing Compound
After sanding, the surface should have a consistent appearance without obvious deep scratches from earlier stages. It may still look hazy, but the remaining fine marks can often be reduced using a polishing compound designed for cured epoxy resin or suitable plastics.
Choose a compound that matches your finishing requirements. Some products are intended for initial cutting and scratch removal, while others are designed for the final polishing stage.
How to Polish Epoxy Resin by Hand
- Make sure the surface is clean and completely free from loose sanding residue.
- Apply a small amount of suitable polishing compound to a clean microfibre cloth or compatible hand-polishing pad.
- Work on a small area using gentle, even movements.
- Follow the compound manufacturer's instructions for application and removal.
- Wipe away residue with a clean cloth and inspect the result under good lighting.
- Repeat if necessary, using a fresh, clean cloth when appropriate.
Hand polishing is ideal for small castings, decorative resin pieces and jewellery. It provides greater control over delicate details and helps prevent excessive material removal around edges.
How to Polish Epoxy Resin with a Machine
For larger surfaces, such as river tables and resin furniture, a suitable variable-speed polisher can make the process more efficient. Use a compatible polishing pad and a compound intended for the material.
- Fit the correct polishing pad securely to the machine.
- Apply a small amount of polishing compound according to its instructions.
- Spread the compound across a manageable section before starting the machine, where the equipment instructions permit.
- Begin at a low, controlled speed and use light, even pressure.
- Keep the pad moving to avoid concentrating heat in one area.
- Check the surface frequently and allow it to cool if it becomes warm.
- Wipe away the residue and inspect the gloss before treating the next section.
Do not apply excessive pressure or use an unnecessarily high speed. Epoxy resin can soften or become damaged when exposed to excessive friction and heat. Take extra care around corners, thin edges and decorative details.
Step 6: Remove Haze and Restore the Gloss
Once polishing is complete, remove any remaining compound residue with a clean microfibre cloth. Examine the surface from several angles under bright lighting to identify any remaining swirl marks, dull patches or scratches.
If the resin looks glossy in one area but cloudy in another, the surface may not have been sanded evenly. It may also indicate that the polishing compound or pad is unsuitable for the finish you want.
To improve the result:
- Check whether deeper sanding marks remain beneath the polish.
- Return to the appropriate sanding stage if visible scratches have not been removed.
- Use a suitable finer polishing compound if your chosen system requires a second finishing stage.
- Use a clean pad or cloth to prevent old abrasive particles from scratching the surface.
- Inspect the surface after removing all polishing residue rather than judging it while the compound is still present.
Patience is essential. A high-gloss finish comes from a consistent sanding and polishing process rather than from applying more compound or pressing harder.
How to Make Epoxy Resin Shiny Without Polishing
Polishing is not always the best solution. If the surface is badly uneven, contains widespread defects or has deep scratches, applying another compatible clear resin coat may produce a more suitable result than trying to polish the entire piece.
A fresh coat can restore a glossy surface when the underlying project is properly prepared. However, it will not automatically correct every defect, and contamination or poor application can cause further problems.
Before recoating:
- Check that the original resin has cured sufficiently.
- Follow the manufacturer's surface preparation and recoat instructions.
- Remove dust, grease and other contaminants using an approved cleaning method.
- Apply the new coat within the recommended conditions and thickness limits.
- Protect the surface from dust while the resin cures.
For a small scratch, localised repair may be possible. For widespread damage, a full compatible coating may be more practical. Always test your method on a sample or inconspicuous area first.
Common Epoxy Resin Polishing Mistakes to Avoid
1. Polishing Before the Resin Is Fully Cured
Insufficiently cured resin may smear, clog abrasives or become damaged during polishing. Follow the curing instructions for your specific product before beginning any finishing work.
2. Skipping Sandpaper Grits
Moving directly from a coarse abrasive to a very fine one can leave scratches that remain visible through the final polish. Progress gradually and remove the previous scratch pattern before moving on.
3. Using Too Much Pressure
Heavy pressure can create uneven patches and unnecessary heat. Use controlled movements and let the abrasive or polishing compound do the work.
4. Allowing the Surface to Overheat
Excessive friction can soften or damage epoxy resin. Work in manageable sections, use appropriate machine settings and stop if the surface becomes excessively warm.
5. Using Dirty Cloths or Polishing Pads
Contaminated pads can introduce new scratches, even after careful sanding. Keep separate clean cloths and pads for different finishing stages.
6. Expecting Polish to Remove Deep Scratches
Polishing compounds are not a substitute for proper sanding when significant scratches remain. Correct the surface first, then refine it with progressively finer abrasives.
7. Ignoring Safety Precautions
Fine sanding dust can irritate the respiratory system, while polishing machines can create heat and flying debris. Use appropriate protective equipment, suitable dust extraction and safe operating practices throughout the process.
How to Get a Glossy Finish on Resin Tables and Decorative Projects
Different epoxy resin projects need slightly different finishing techniques. Understanding the material and the shape of your project helps you choose an approach that gives a more consistent result.
Epoxy Resin River Tables
River tables often combine wood grain with a large resin section, so the finished surface needs to look even across both materials. Make sure the tabletop is properly level before moving through the sanding stages. Take particular care where the resin meets the wood, as uneven sanding can affect the appearance of the joint.
For large surfaces, a suitable machine can improve consistency, but it must be used with the correct pad, speed and abrasive. Inspect the tabletop regularly under angled lighting.
Resin Jewellery and Small Crafts
Jewellery, pendants and small moulded decorations often have curved surfaces or narrow edges. Hand sanding and polishing provide better control in these areas. Use fine abrasives and avoid removing too much material, especially around small decorative details.
If you are creating colourful pieces, Res-iT epoxy resin kits and suitable mica pigments can help you explore different designs. Follow the instructions for your chosen resin and pigment to achieve a consistent result.
Resin Trays, Coasters and Home Décor
Flat decorative items benefit from careful surface preparation and even finishing. Once the resin has fully cured, check the edges and corners as well as the main surface. These areas can easily be overlooked during sanding and may remain dull if they are not finished consistently.
Choose a polishing method that suits the shape of the piece and keep your finishing materials clean between stages.
Which Res-iT Products Can Help with Your Next Resin Project?
A successful resin project begins with selecting a kit that suits the size and type of casting you want to create. The right preparation tools also help you measure, mix and handle your materials consistently.
Res-iT Epoxy Resin Starter Kits
If you are new to resin crafting or making smaller decorative pieces, a starter kit is a practical place to begin. Choose the kit size according to your project's estimated resin requirements and allow for any material needed for moulds, testing and finishing.
Explore these options:
- 240ml Starter Kit: A compact option for small crafts and sample projects.
- 480ml Starter Kit: Suitable for a range of small decorative castings and creative experiments.
- 1L Starter Kit: An option for makers planning larger crafts and several small projects.
- 2L Pro Kit: Suitable for a broader range of casting and decorative projects.
- 4L Pro Kit: A larger kit option for makers who need more material for their projects.
Always check the current product descriptions, mixing ratio, recommended application thickness and curing instructions before purchasing.
Res-iT Deep Pour Resin for Tables and Larger Castings
Planning a river table, thick casting or large decorative project? A deep-pour resin system may be more appropriate than a standard coating resin, provided its specifications match the dimensions and requirements of your design.
- 3L Deep Pour Starter Kit: A useful option for smaller deep-pour projects and experimental castings.
- 6L Pro Deep Pour Kit: Consider this option for larger casting projects that require more resin.
- 12L Pro Deep Pour Kit: Designed for larger pours, including river tables and slabs, within the product's stated thickness limits.
Do not select a resin solely because it promises a glossy appearance. Match the formulation to the required pour depth, working time, project size and curing conditions. A deep-pour product should not be used outside its specified limits.
Resin Mixing and Safety Accessories
Consistent mixing and careful preparation help reduce avoidable problems before a project reaches the finishing stage. Depending on your needs, useful accessories include:
- Digital weighing scale: Helps measure materials accurately when the product instructions specify weighing.
- Measuring cups and mixing stirrers: Support organised measuring and thorough mixing.
- Nitrile gloves: Help protect your hands when used in accordance with the resin's safety instructions.
- Respirator mask: Choose suitable respiratory protection for the hazards identified in the product safety information.
Use each accessory for its intended purpose and follow the resin manufacturer's instructions. Good preparation can reduce avoidable mixing and finishing issues, although a glossy finish still depends on proper curing, surface preparation and polishing technique.
How to Maintain a High-Gloss Epoxy Resin Finish
After spending time sanding and polishing your project, a few simple habits can help maintain its appearance.
- Clean the surface with a soft cloth and a mild cleaning solution suitable for cured epoxy.
- Avoid abrasive scouring pads that can create fine scratches.
- Wipe away spills promptly and avoid prolonged exposure to aggressive chemicals.
- Use suitable protective mats or coasters on resin furniture.
- Avoid dragging rough or sharp objects across the surface.
- Keep the item away from excessive heat and follow the resin manufacturer's care recommendations.
- Inspect the finish periodically and address minor surface marks before they become more noticeable.
Although cured epoxy resin can be durable, a high-gloss surface is not completely scratch-proof. Everyday use, cleaning methods, heat and environmental exposure can gradually affect its appearance.
Frequently Asked Questions About Polishing Epoxy Resin
What is the best way to polish epoxy resin to a high gloss?
For most fully cured resin surfaces, the process involves removing imperfections with suitable sandpaper, progressing through finer grits, and finishing with a compatible polishing compound. The exact method depends on the condition of the surface and the resin system.
What grit sandpaper should I use before polishing epoxy resin?
For an already level surface with light imperfections, you might begin around 400–600 grit. More substantial defects may require a coarser starting grit, while a well-prepared surface may need only finer abrasives. Progress gradually and do not skip the stages needed to remove existing scratches.
Why does my epoxy resin look cloudy after sanding?
Sanding creates tiny scratches that scatter light, making clear resin appear cloudy or matte. This is normal. Progressing through finer abrasives and using a suitable polishing compound can restore clarity, provided the deeper scratches have been removed.
Can you polish epoxy resin by hand?
Yes. Hand polishing is suitable for small castings, jewellery, decorative items and detailed edges. Use a suitable polishing compound, a clean cloth and gentle, consistent movements. Larger surfaces may be easier to finish with compatible polishing equipment.
Can toothpaste polish epoxy resin?
Some toothpastes contain mild abrasives, but their performance varies and they are not necessarily formulated for epoxy resin. A polishing compound designed for cured resin or suitable plastics is generally a more predictable choice. Test any product on a sample before using it on a finished piece.
How do you remove scratches from epoxy resin?
Light scratches may respond to a suitable polishing compound. Deeper scratches usually require careful sanding, followed by progressively finer abrasives and polishing. If the damage is extensive, a compatible recoating method may be more appropriate.
Can you polish epoxy resin without sanding?
Yes, if the surface is already smooth and only needs its shine refreshed, polishing alone may be sufficient. Sanding is usually necessary when scratches, uneven areas or other surface defects need to be removed.
How long should epoxy resin cure before polishing?
The required curing time depends on the resin formulation, temperature, casting depth and other conditions. Follow the manufacturer's instructions and make sure the resin has reached the recommended cure for sanding and polishing before you begin.
Can you restore the gloss of an old epoxy resin table?
Often, yes. A table with minor dullness or shallow scratches may respond to careful sanding and polishing. A badly damaged or uneven surface may need levelling or a compatible fresh resin coat. Assess the condition before deciding which repair method to use.
Final Thoughts: Achieve a Smooth, Glossy Epoxy Resin Finish
Learning how to polish epoxy resin to a high gloss finish can transform the appearance of a project. From small handmade decorations to large river tables, the most reliable results come from allowing the resin to cure properly, preparing the surface carefully and working through the appropriate sanding and polishing stages.
Take your time, use clean finishing materials and avoid excessive pressure or heat. If your surface is already smooth, a suitable polishing compound may be enough. If it contains deeper scratches or uneven areas, correct those imperfections before attempting to restore the shine.
Planning your next resin creation? Explore the Res-iT epoxy resin starter kits, Pro kits, deep-pour resin and mixing accessories to find materials suited to your project. Choosing the right resin and preparing it correctly from the beginning can make the entire crafting process more predictable, from the initial pour to the final polished surface.